
- Step 1. Go to https://ged.com/en/ and click on “Sign Up”

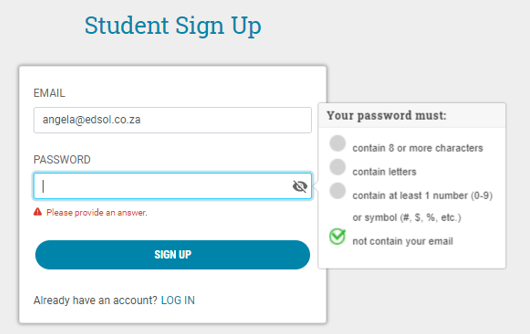
Step 2. Insert your email address, create a password and click on “Sign Up”
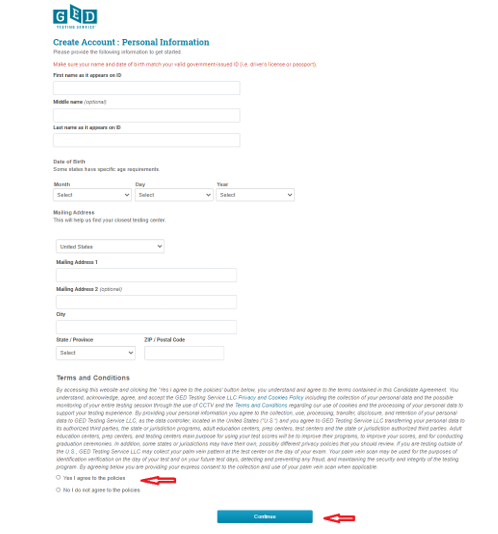
Step 3. Add your personal information NB: Double check your information to ensure that it corresponds with your ID document. Click on “Yes I agree to the policies” and “Continue”
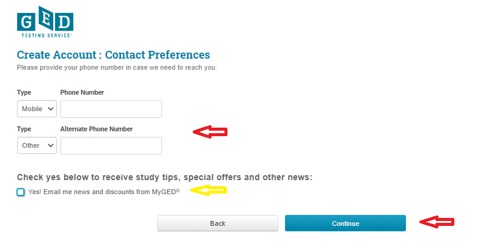
Step 4. Add your contact telephone numbers (receive study tips, special offers and other news is optional), then click on “Continue”
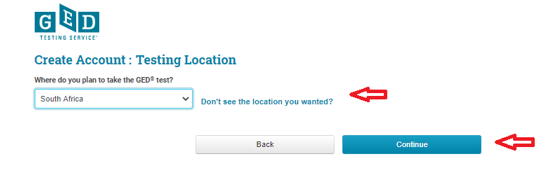
Step 5. Stipulate where you plan to take your GED test and click on “Continue”
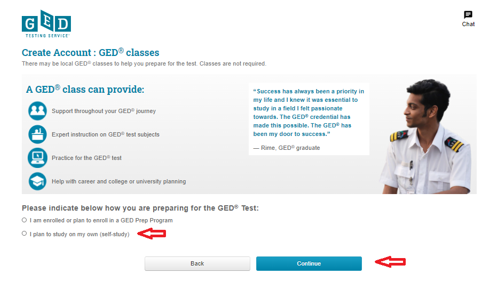
Step 6. Click on “I plan to study on my own” and “Continue”
Step 7. The GED offer testing accommodations for students who have learning disabilities. If you would like to apply for an accommodation click on “Yes” and go to Step 9 for further instrutions. If you do not require an accommodation click on “No” and “Continue”

Step 8. Congratulations, your profile has been successfully created! You can now schedule a test or bowse study options.

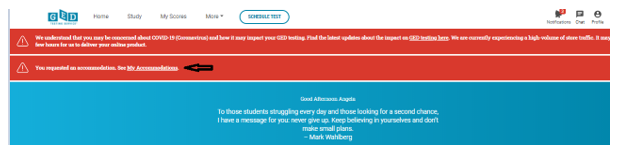
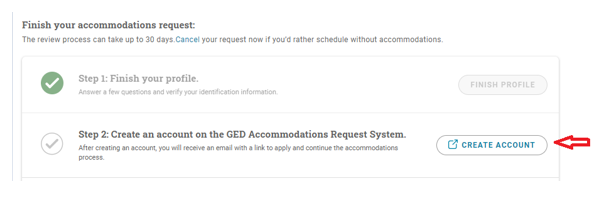
Step 9. If you clicked on “Yes” for an accommodation, then click on “See My Accommodations”
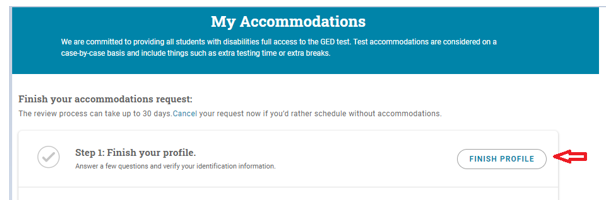
Step 10.Click on “Finish Profile”
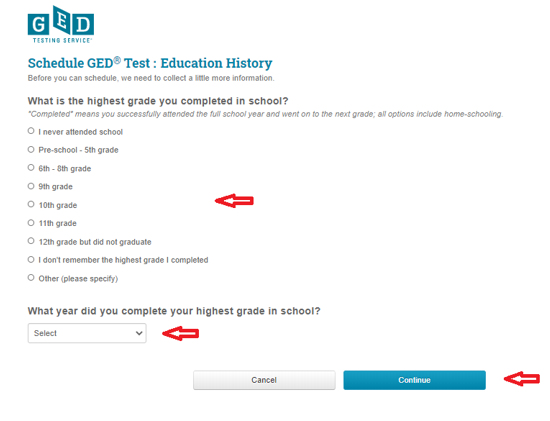
Step 11. Choose the highest grade you completed in school, the year and click on “ Continue”
Step 12. Click on “Yes” and “Continue”
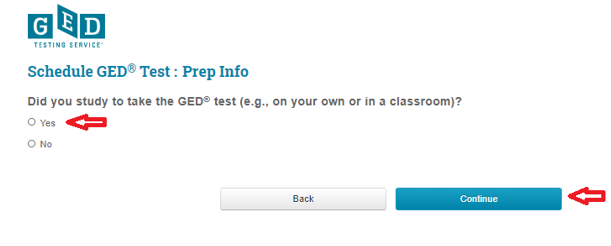
Step 13 Select applicable answers and click on “Continue”
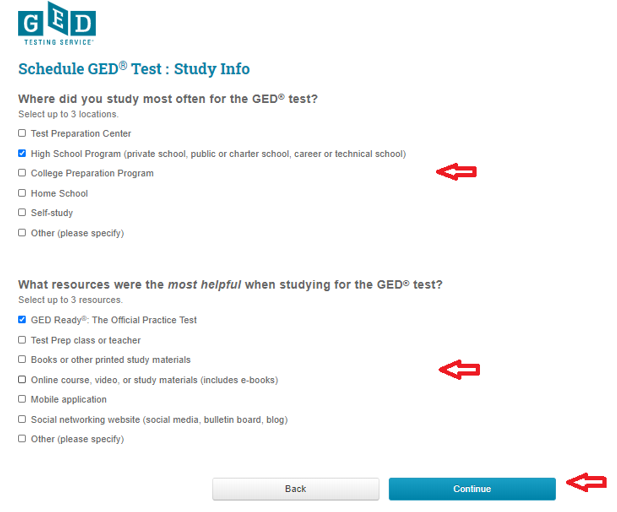
Step 14. Select applicable answers and click on “Continue”
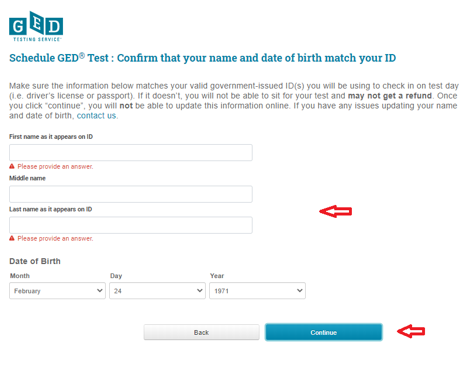
Step 15. Confirm your personal details and click on “Continue”
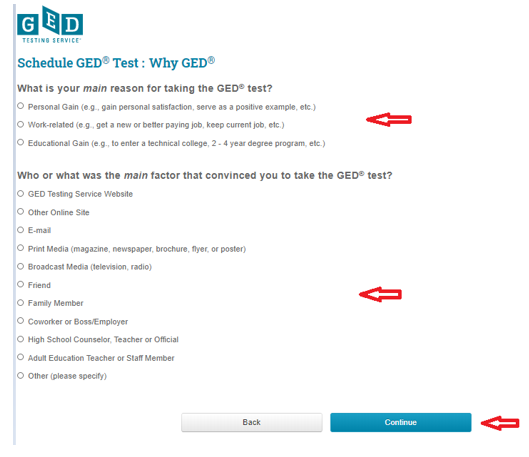
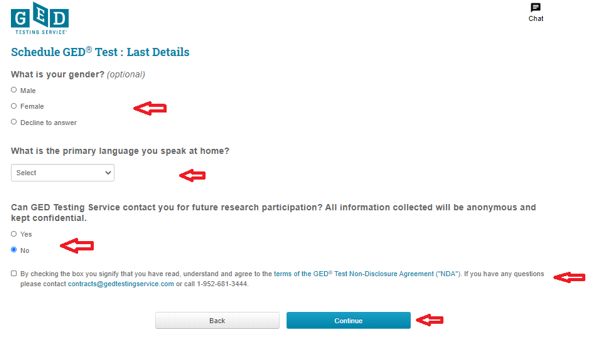
Step 16. Select applicable answers, accept terms and conditions and click on “Continue”
Step 17. Click on “Create Account”
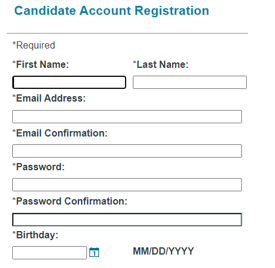
Step 18. Add personal details, confirm if under 18, agree to terms and conditions and click on “Continue”

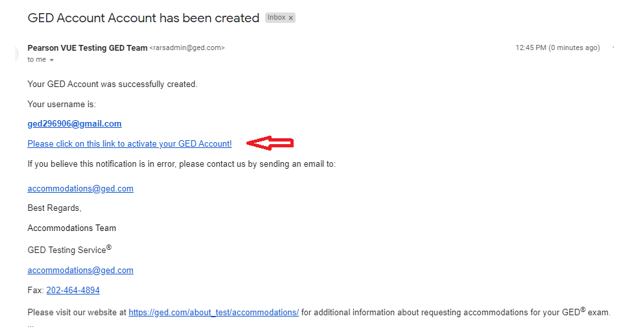
Step 19. You will receive a verification email from Pearsons View Testing GED Team
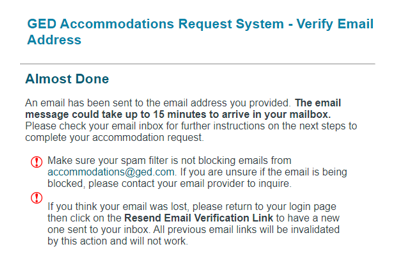
Step 20. Open the email and click on the link to activate the account
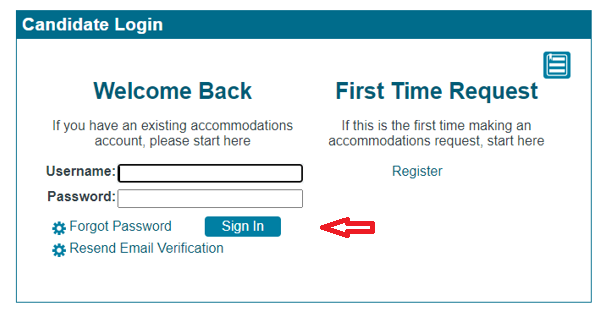
Step 21. You will be directed to the GED Testing Service and prompted to insert your Username and Password and click on “Sign In”
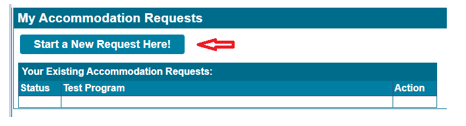
Step 22. Click on “Start a New Request Here”
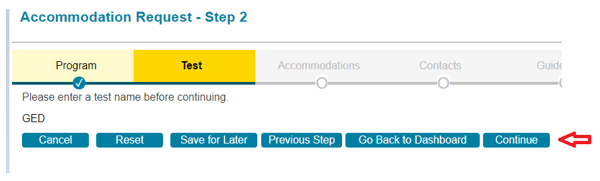
Step 23 Click on “Continue”
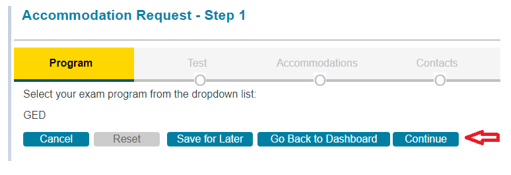
Step 24. Click on “Continue”
Step 25. Click on the drop down menue and specify the disability
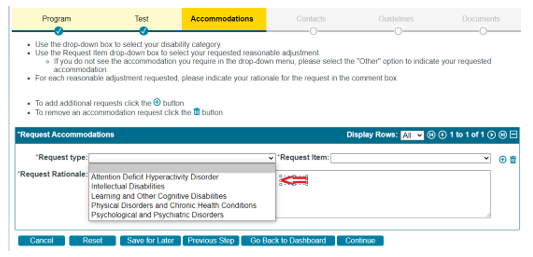
Step 26. Click on “Request Item” and specify type of accommodation required, type a short desription of the disability and click on “Continue”

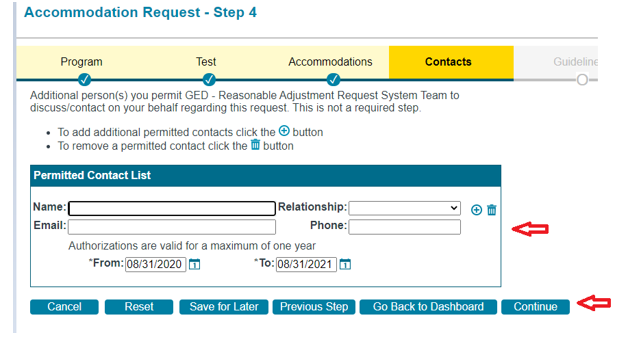
Step 27. Add additional permitted contacts and click on “Continue”
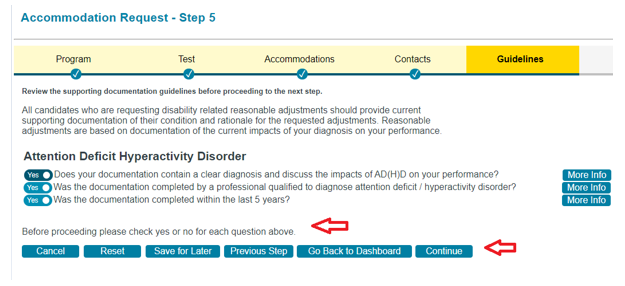
Step 28. Specify “Yes” or “No” for each question and click on “Continue”
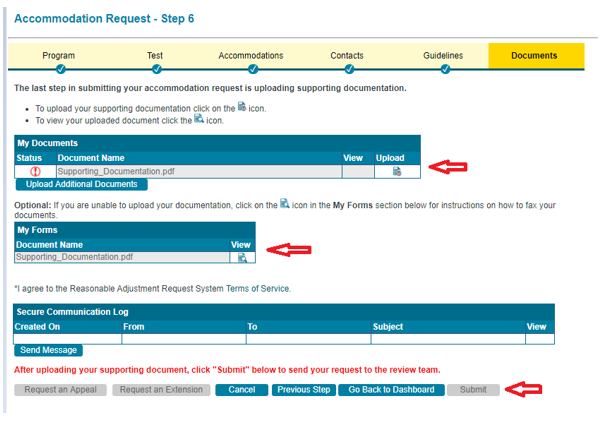
Step 29. Upload supporting documents and click on “Submit”
NB: The accommodations review team will respond with their decsion within 30 days.